Sydney Marathon 2025 Breakdown
📅 23/07/2025 | ✍️ Tony
Unsure about how to pace yourself on race day? We dissect the 2025 Sydney Marathon course in this post, giving some advice on how to tackle each segment.
Pacing a marathon is hard, even for seasoned marathoners. Having a clear mental model of how you want to approach the 42km will help you stay focused and have a better experience on race day.
The most shared advice in history for long-distance running is "don't start too fast". We have all heard it before, we can all logically think about it and understand the concept, yet we all keep messing it up and running faster than we should in the first half of the race. Well, here is my humble attempt to give you that advice, again:
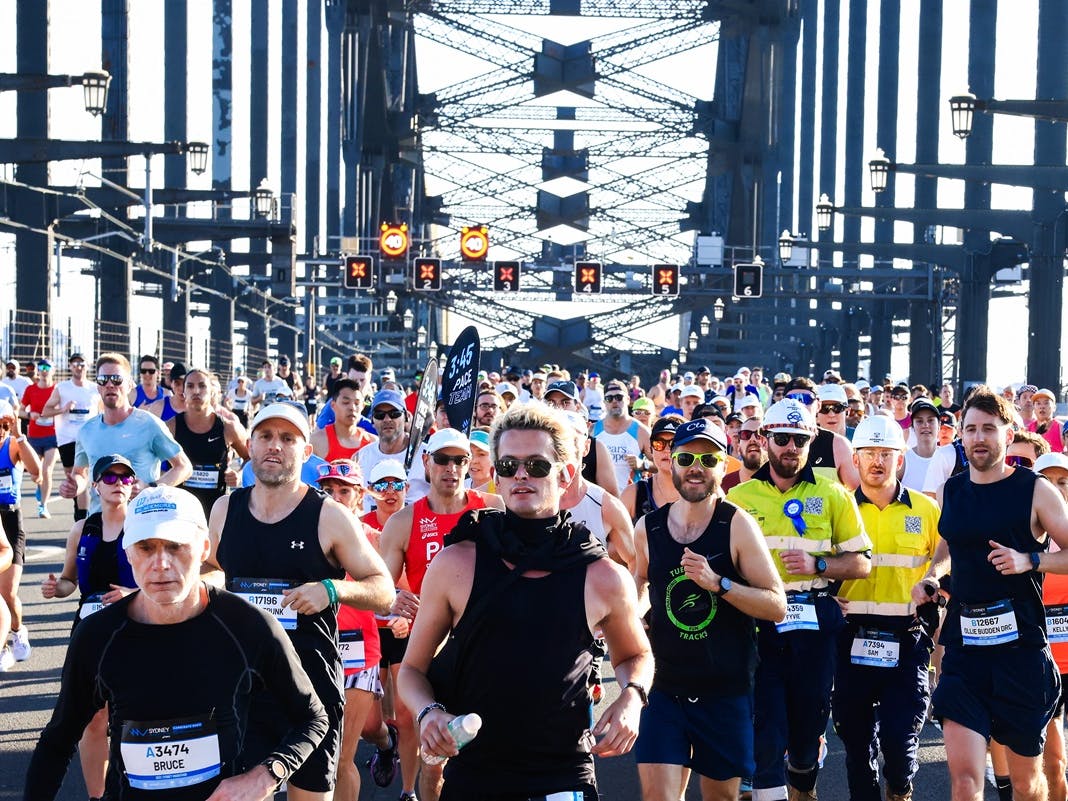
First 5K: Don't Start Too Fast!
Starting too fast is probably the most common mistake recreational and elite runners make in long-distance races. For the Sydney Marathon, the downhill start makes it even harder to pace yourself on this initial stage of the race. Don't smash your legs on this first 5km, it will surely feel easy, but you are inadvertently hammering your quads, which you will regret in the last 10km of the race.
This section features one of the best parts of the race, which is running over the Sydney Harbour Bridge. There is a bit of an uphill as you get to the bridge, and then pretty much all downhill as you go down the bridge into Pyrmont.
For the first 5km, run just on your planned pace or even slower, this will pay off later in the race.
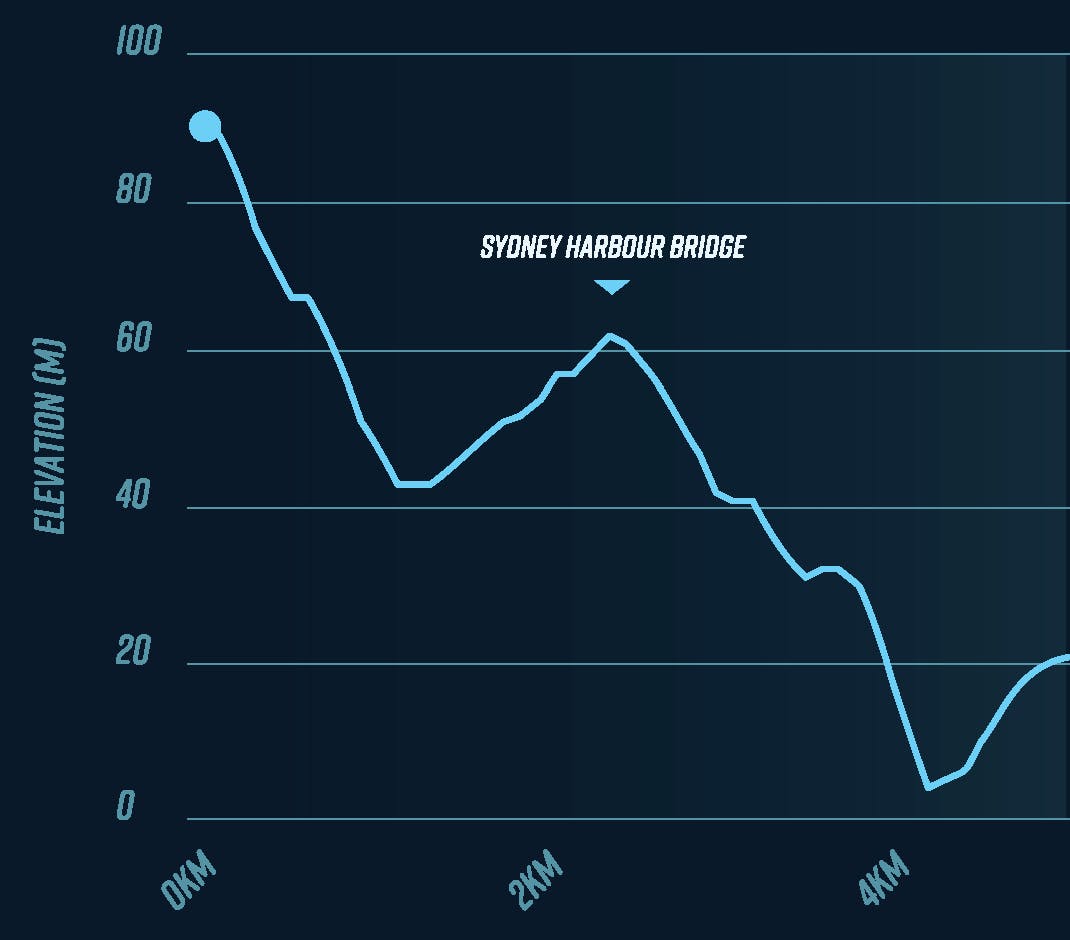
5–10K: Settle into the City
This section rolls gently as you head through Pyrmont and the CBD, mainly hovering between 10–30m elevation. There are no major climbs, but the terrain undulates enough to break your rhythm. It’s a good time to shake off the nervousness and adrenaline after the iconic start over the bridge and settle into your marathon pace effort. The key here is to focus on effort, not pace, as your pace will vary during the ondulated course of the race. At this point, this should feel controlled and cruisy.
ℹ️There are two water stations located around km 6 and 7.
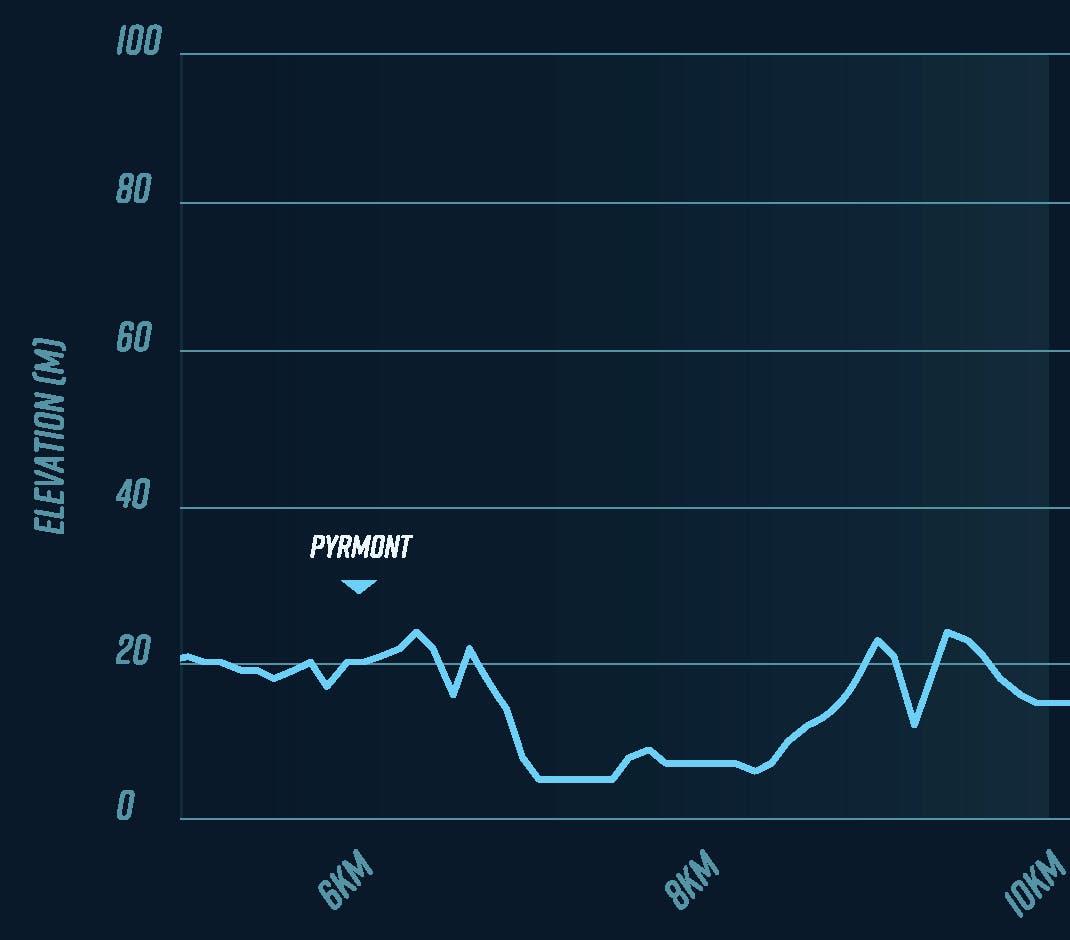
10-15K: A Gentle Grind Begins
From the 10k mark up to the 13k mark, the course is relatively flat as you run under the Sydney Harbour Bridge, through the CBD and head towards Oxford Street.
A gradual incline begins around 13–14 km, gaining about 30m, which peaks at Oxford Street. You should try to maintain a similar effort as you were running during the flat section in the CBD. Avoid surging during this ascent. This means the pace will be slower, but the overall effort should feel similar. At this point, you want to still feel comfortable and relatively fresh in your legs. If you think you're pushing at this point, slow down! There is still a long way to go. Your patience will pay off.
ℹ️3 water stations available in this section, one at the 10k mark, one in the middle around the 12.5k mark and another one just before the 15k mark.
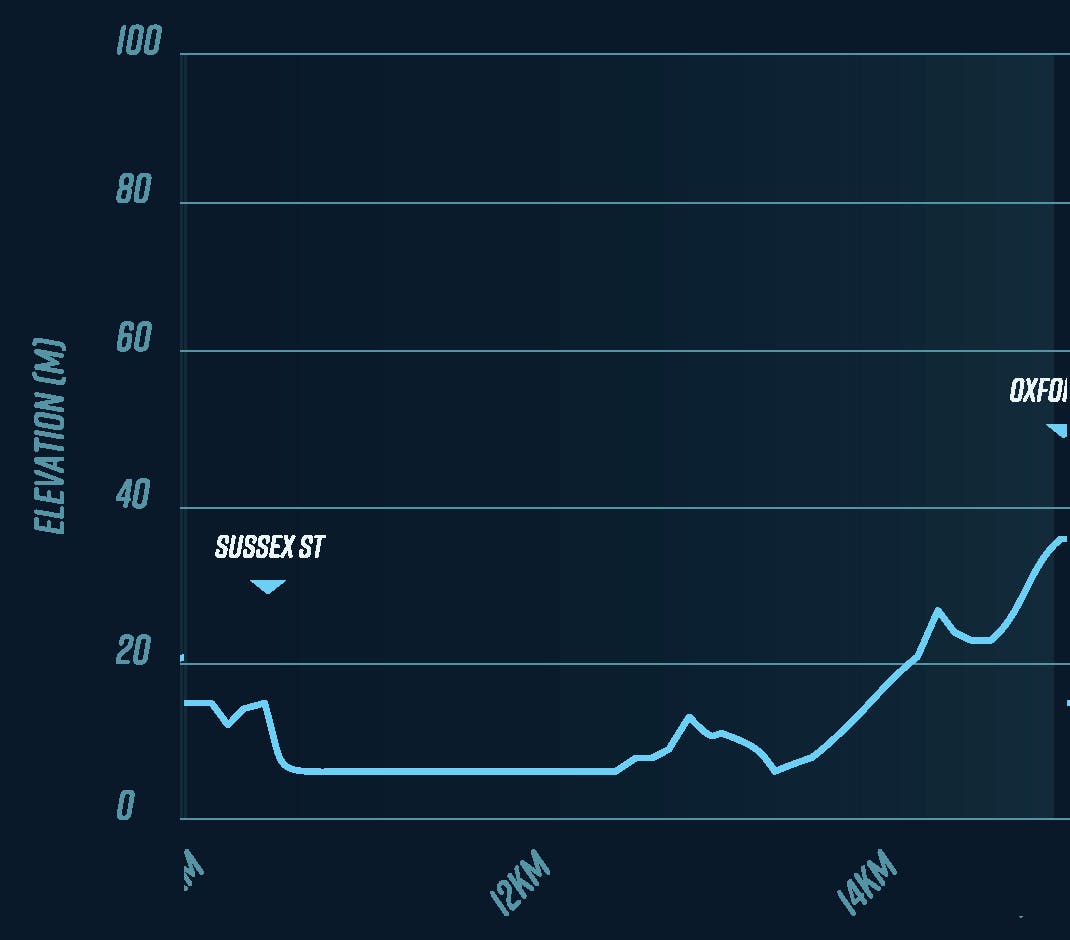
15-20K: The Climbing Continues
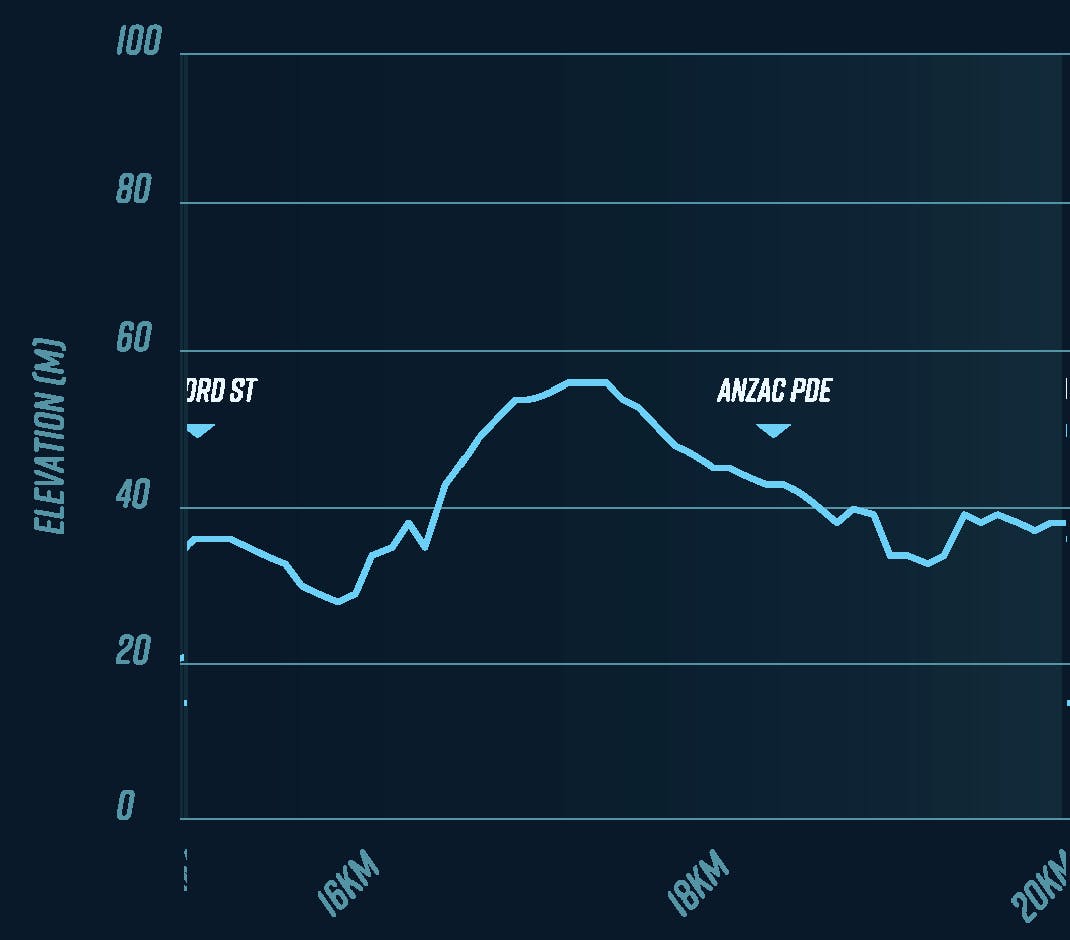
You have already climbed around 30m from the 13K mark. You now get around a 1K of relatively flat/downhill and then, starting around 16 km, you’ll face a steady ascent from ~30 m up to ~60 m, cresting in the 17–18 km range. Again, tackle this climb by effort, not pace. Shorten your stride, maintain a strong cadence, and breathe in a controlled manner. If you cannot breathe controlled, you are probably exerting too much. Once at the top, the slope eases into a gradual descent to 20 km, perfect for recovering and getting back into your rhythm. Let gravity help you, but stay in control to save your legs for later.
ℹ️There is a water station around the 18k mark
20-25K: Calm After The Climb
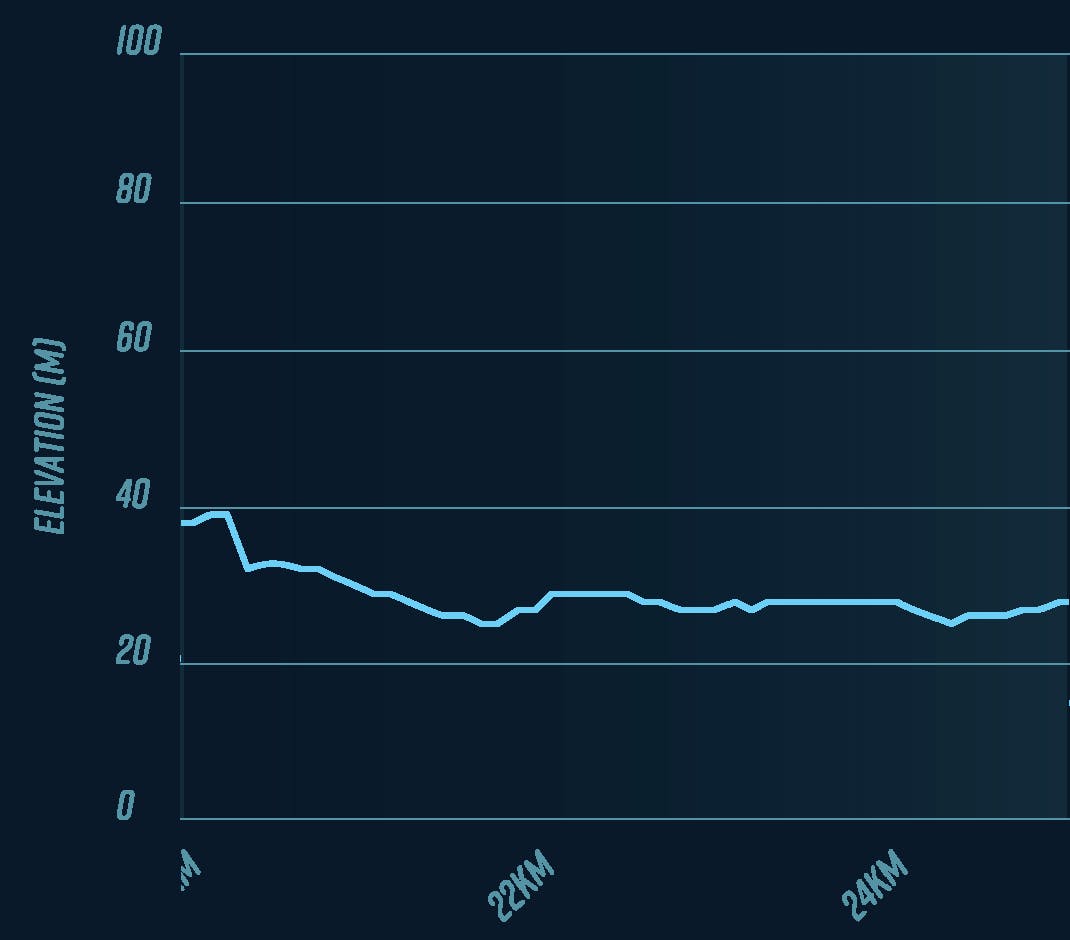
This is the flattest section of the course. It comes at a convenient time after you have completed the hilliest part of the course from 13-18K, gaining around 60m. Use this 5km to recover and get back into your marathon effort rhythm. After the half-marathon mark, it is a good time to check in on how you are feeling mentally and physically. You have started to feel some signs of accumulated fatigue, but you want to feel as if you still have plenty in the tank for the second half. This is the perfect time to adjust and build momentum for the second half of the race. Stay relaxed and conserve energy.
ℹ️ There are two water stations in this section, at the 20k and 23k mark.
25-30K: Your Way To The Parklands
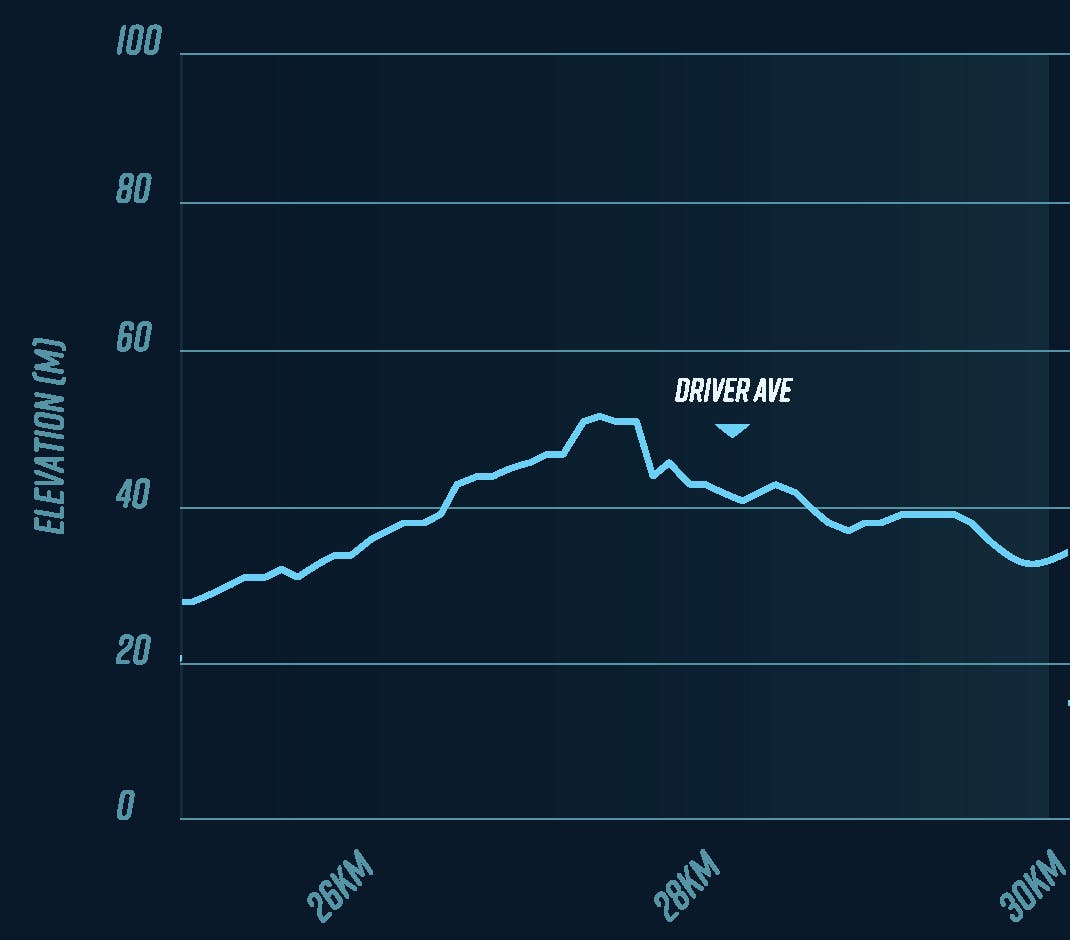
This section features a steady climb of ~30m along 25-28K. This one is especially tricky, as you are now fatigued. Although this hill is not as pronounced as the first one in 15-20K, it will feel just as hard, if not harder. You need to be patient here and take it easy during this hill. You want to get through it without much fuss, even if that means slowing down considerably. Every bit of energy you save now will pay off later.
From 28-30K you will have a slight downhill that will help you recover from the hill and get ready to enter Centennial Park.
ℹ️ There are water stations at 25K and 28K
30-35K: The Centennial Park Loop
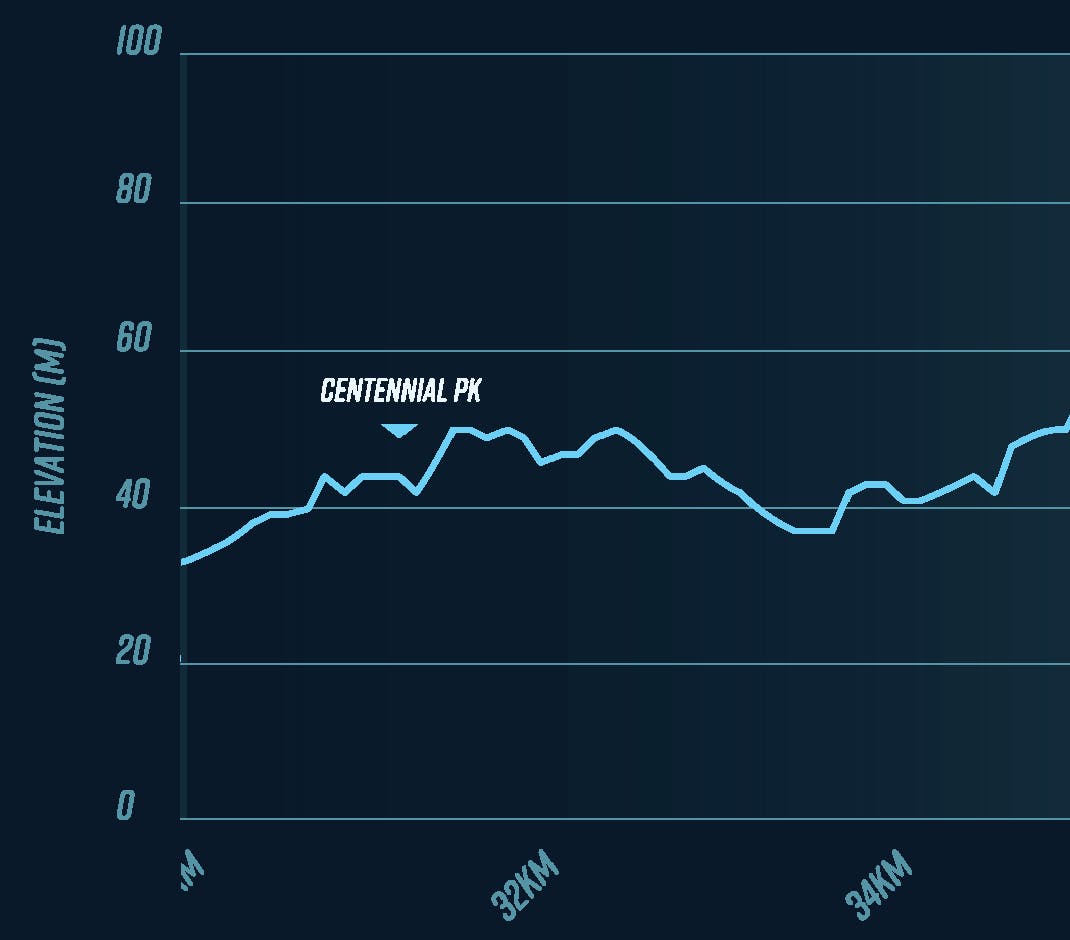
You are now entering the last stage of the race. Great time to check in again. How do you feel, and gauge how much you still have in the tank? You still have time to adjust and focus on what is left. This section does not have any sharp hills but instead rolls up and down ~20m. Stay focused on maintaining a consistent effort level as you go through these ups and downs.
Focus on staying mentally switched on. It may be a tough patch, but a downhill section is just around the corner. Now is when you will start "feeling the marathon" Embrace it!
ℹ️ There are two water stations around 30K and 33K.
35-40K: Downhill To The Gardens

The last 7K of the race. No doubt the most challenging part of a marathon. The mental aspect of marathon running is key at this point. Make sure your internal dialogue is positive and stay focused. This section is mostly downhill towards the CBD. Use gravity in your favour, but don't chase any specific pace splits. Continue to listen to your body and remain vigilant. Now is when fatigue starts to bite.
ℹ️ There are three water stations in this section: at 35K, in the middle at 35.5K and just before the 40K mark.
40-42.195K: The Final Push
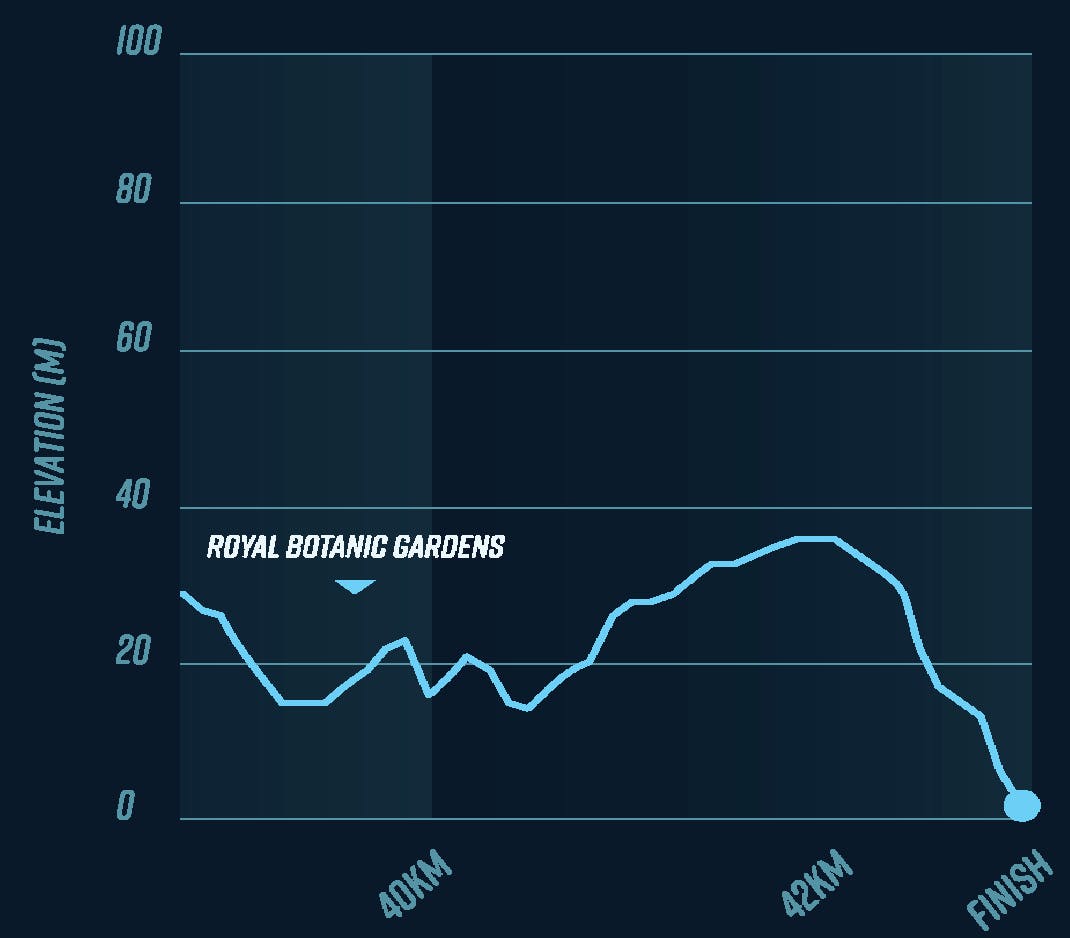
This is it. You only have one last hill to push through, which ascends around 20m over a mile. This may sound like a relatively manageable incline on paper, but after 40K of running, it will feel brutal. You have gone through a few of these during this course, so once again, focus on maintaining momentum. Once you are done with this one, there is 200m downhill towards the Opera House. Soak in this moment, enjoy the fruit of all your hard work and FINISH STRONG!
ℹ️ There is a last water station available around the 41K mark as you get to Macquire Street.
Good Luck!
Every runner's experience is different, but having a pacing plan and sticking to it can make all the difference. The Sydney Marathon is a beautiful but challenging course, and respecting the hills and managing your effort wisely will set you up for a strong finish. If you'd like to discuss your race strategy or need specific advice, feel free to message us on Instagram. Always keen to chat all things running.